Images, PDFs, and Proxxied
Import your deck and customize card art on Proxxied, then export high-DPI prints with optional upscaling.
Looking for an alternative method? Check out our MTGProxyPrinter guide for a different approach using MTGProxyPrinter software.
Quick Start: Import Deck and Customize on Proxxied
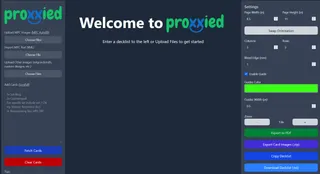
Visit proxxied.com to import your deck list and customize card art. When ready to export, use bleed edge as it takes minimal extra time and gives you more precise cutting.
You can also use that same list to continue with advanced workflows using Proxxied's export features.

Add cards and customize art on Proxxied
Import and Customize Your Deck:
- Paste or import your deck list into Proxxied, or use MPCFill to get high-DPI images.
- Click on any card to change its art to your preferred version.
- Arrange your cards in the layout grid as desired.
- Set your bleed edge preferences for clean cutting.
Configure Proxxied for Optimal Results
Proxxied offers flexible configuration options to ensure your proxy cards print perfectly. Here are the key settings to optimize:
- Set your preferred
paper size and marginsin the layout settings. - Configure
bleed edgesettings — handy if your cuts aren't 100% precise or when printing double‑sided cards to avoid white edges. - Enable
cut markersfor easier card separation. - Consider setting
1px guide widthfor better visibility when cutting.
Printing
- When ready, click
Export to PDF. - Open the PDF in your preferred PDF viewer or printer software.
- Make sure to print at
100% scaling(no fit to page). - Use the system print dialog to adjust any final settings.
Create a Two‑Sided Cards (Front/Back Alignment)
For manual duplex printing where you flip the paper yourself, build two PDFs (fronts then backs) with matching positions.
- Create your FRONT sheet: import or place the first‑side images in any order (e.g., 1 → 9 across the 3×3 grid) and export a PDF.
- Create your BACK sheet: add the second sides using the same row logic - you can simply drag them where you need them:
- Row 1: (1 ↔ 3) and (2 ↔ 2) and (3 ↔ 1)
- Row 2: (4 ↔ 6) and (5 ↔ 5) and (6 ↔ 4)
- Row 3: (7 ↔ 9) and (8 ↔ 8) and (9 ↔ 7)
- Print the FRONT PDF, flip the stack consistently, then print the BACK PDF. Use identical margins, bleed, and scale on both prints.
Get High-DPI Images with MPCFill (Recommended)
For the best printing results with high-DPI images, we recommend using MPCFill.com Editor. This is the preferred method as it provides high-quality, print-ready card images and saves significant time compared to manually creating orders.
Import from Deck Sites
You can directly import decks from these popular sites:
- Aetherhub
- Archidekt
- CubeCobra
- Deckstats
- MagicVille
- ManaStack
- Moxfield
- MTGGoldfish
- Scryfall
- TappedOut
- TCGPlayer
Go to the editor and click Add Cards → Link from the editor to import directly.
Alternative: Text List Method
Create a simple text list with the format: Quantity Card Name (each card on a new line).
1 Sol Ring
4 Counterspell
2 Rhystic Study
20 Swamp
Go to the editor and click Add Cards → Text to paste your list.
Select Your Artwork
The site will display each card from your list. Many cards have multiple art versions available - click through the images to select your favorite for each one.
Download Your XML File
Once you've selected all your artwork, click the "Download" button. This will generate and save an XML file to your computer containing all the information and image links for your order.
Import into Proxxied
In Proxxied:
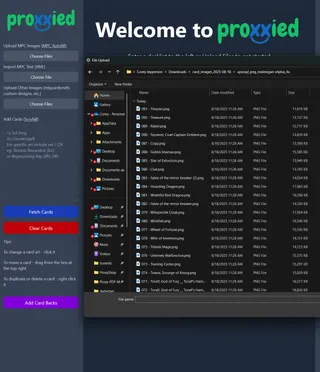
- Click Choose File under Import MPC Text (XML)
- Select your downloaded XML file
- Proxxied will generate your deck with high-DPI images
- Then you can export to PDF as usual
This method ensures you get the highest quality card images available, resulting in the best possible print results.
Note about New Sets
Advanced: Upscale Your Cards for Better DPI
- On Proxxied: Click
Export Card Images (.zip)and extract the ZIP file to an empty folder. - Open Upscayl, switch to
Batch Mode, select that folder, choose your model, and Upscayl. - Back in Proxxied: Use the
Upload Other Imagesbutton to upload the upscaled images (Upload MPC Images is for images that already have bleed). - Tip: You may want to break the images into sets of 9 as uploading too many at once can crash the browser.

More Tools: Build PDFs and Trim Bleed
- print-proxy-prep— desktop utility to crop away bleed from card images (including Proxyshop renders) and assemble printable PDFs. Great for quick, at‑home jobs. See repo for setup.
- ProxyPrint (web)— online builder to arrange images into sheets and export a PDF.
Both tools complement Proxxied—use whichever fits your workflow for advanced layouts or custom card processing.
Create Custom Cards
Design fully custom cards with one of these tools:
- Proxyshop— best if you have Adobe Photoshop; generates high-quality, print-ready renders.
- Card Conjurer (self-hosted)— runs locally with Docker or a simple launcher.
Card Conjurer: Installation
Prefer a video walkthrough? Watchthis guide.
Card Conjurer: Docker installation
- Install Docker:Get Docker
- Install
make(Windows users may need to install it separately). For macOS/Linux, see the repo instructions. - Download the Card Conjurer repo (Green
Codebutton →Download ZIP) or clone it with git. Extract the ZIP if downloaded. - Open a terminal in the project folder and run
make start. - Open
http://localhost:4242/in your browser.
Card Conjurer: Simple launcher (no Docker/WAMP)
- Works best on Windows. If you can follow the Docker method above, prefer that.
- Download the repo ZIP fromCard Conjurer GitHub, then extract it.
- macOS only: in the project folder, run
chmod a+x launcher-macosonce, then right‑click the file → Open With → Other → enable “All Applications” → choose “Terminal” and “Always Open With”. - Run
launcher.exeon Windows,launcher-macon macOS, orlauncher-linuxon Linux. - Your browser should open to your local Card Conjurer site. If assets look stale, press
Ctrl+F5to hard refresh.